
This nail tutorial is really easy to do & requires no tools other than just a straw, yes a straw! All you need is a base colour and 3 bright and complimenting colours for the design. This nail tutorial requires a little mess making, so make sure you have something to protect the surface our using from any flying polish!
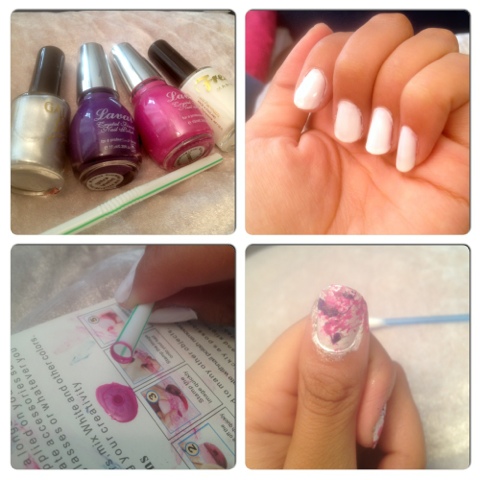
1. First take a basecoat and apply this to your nails to protect them.
2. Paint two coats of white polish onto your nails (or what base colour you choose)
3. This next section can get quite messy so lay down something to protect your surface, I used an old magazine.
4. Take your first chosen colour (I used purple for this) and paint a few dabs of colour onto the bottom of your straw, make sure you don't apply too much as this can cause huge blobs of colour on your nails. It's best to use just a small amount as you can build up to your desired effect as you go along.
5. Place your nail about 5cm away from the straw and blow into the straw. Short sharp bursts achieve the best results.
6. Continue this on all of your nails with your desired colours.
7. I used a silver at the end to add a slight sparkle to my design
8. Finish by using a topcoat to protect your design and add a beautiful shine!

Hopefully you didn't make too much mess whilst using this tutorial, but it really does achieve a great design! Please feel free to show me your own designs!

they look so pretty!! x
ReplyDeletethese look reallyyyy pretty! pink & purple is such a good combo x
ReplyDeleteI know, I think I'm addicted to using this colour combo! x
DeleteThis is sooooo clever, definitely have to try it out!!
ReplyDeleteX
Please show me if you do :) x
DeleteWoww!!! I'm impressed by your nail art! very pretty result ;)
ReplyDeletexx
Thank you! x
Delete